
So I didn't post about this last month but I did a little DIY project down in the basement. This was something I had been thinking about and planning for a couple months and all of a sudden I kicked it in gear because I decided I wanted to have it done and ready for the birthday party. It was a little stressful adding the project tasks on top of normal party planning to do's but I managed to get it done in time! Woo!
Say hello to Kate's new activity area! This was practically dead space, a long hallway leading to an exterior door that no one uses. Since it's a hallway, it would typically be a little cramped for an adult but for a 1 year old it's perfect!
 I wanted to create a space that could be updated with age appropriate activities so this magnetic chalkboard is actually a little too advanced still...since she is only interested in eating the chalk, not learning how to write with it...but the magnetic letters and shapes are very popular! I used a leftover sheet of drywall and painted it first with the magnetic paint then the black chalkboard paint. The border is just a thick natural rope nailed into the wall...easy peasy.
Next I added a felt board. Leftover piece of drywall and glued/screwed/attached a large felt piece. No border, just very simple. Here are some of Kate's 'felt friends'...green frog, goldfish, yellow sun, blue flower, etc.
 On the other side I screwed just a plain wooden board (painted with high gloss) into the wall. This is going to be a blank space for all kinds of fun learning activities. Right now I have paint in ziplock baggies duct taped to the board. Must be very interesting because for some reason every time she goes in, she stops here and smushes the paint for a bit before she moves on... :) Some other ideas for this space is touchy-feely on poster board (i.e. This feels...smooth, rough, prickly, etc), All Things (insert color here), shapes, Things that begin with (insert letter here), etc.
  Here's the sensory board...this was fun to make! Simply a 2x4' peg board, purchased at your local home improvement store, and a bunch of cool stuff! I screwed the board into the wall with anchors with the intention of taking it down and changing it up at some point. It's also important to note that I left a couple inches of space in between the board and the wall because I secured some of the items with zip ties. Anyway, some of the cool stuff on there: an old mouse purchased from Goodwill, a loofah, laces to learn how to tie shoes!, fake grass patch, mirror, feather duster, crazy looking sponge thing, push on night light. I'd say this sensory board gets the most attention so far.
 Finally the reading nook. Ok technically yes, that is a dog bed but who's to say it's not a baby love seat? There's nothing that says it is supposed to be used as a dog bed...aside from the tag that I removed. Kate doesn't care...she told me so. Besides it's pretty comfy and fits perfectly. The shelves are actually plastic rain gutters (thank you pinterest). Very easy install...cut to size with a coping saw (look it up) and screwed directly into wall with power drill and drywall screws. End caps to finish. Voila!
BEFORE Eww gross!
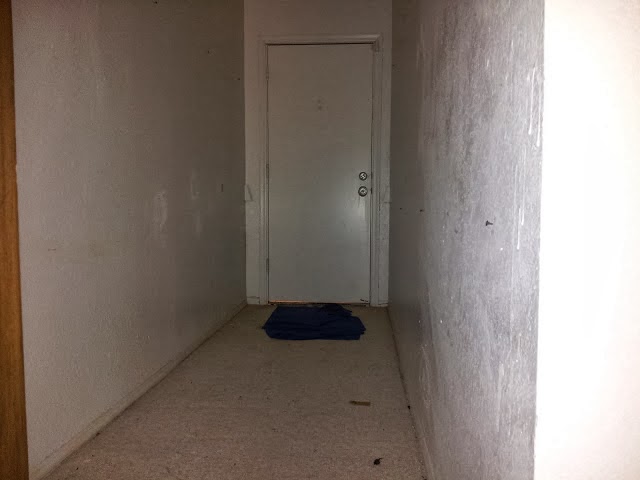
AFTER Ooh cool!
